Teaching kids to code is very popular in schools. Many years ago, in the days of the Apple II and Logo programming, I learned about turtle graphics. I enjoyed learning how to program the virtual turtle and later helping students to do the same.
About five years ago, I learned about Python's turtle module, and it was the segue to my Python journey. Soon, I started using the turtle module to teach students Python programming basics, including using it to create interesting graphics.
Get started with Python's turtle module
On a Linux or macOS computer, you can just open a terminal, enter the word python, and you'll see the Python shell.
If you are using a Windows computer, you will need to install Python first by going to the Python website and downloading the latest stable version.
Next, import the turtle module into Python with import turtle or import turtle as t. Then you can start having some fun creating turtle graphics.
Meet Mu
In the early days of my Python adventure, I used IDLE, Python's integrated development environment. It was much easier than entering commands into the Python shell, plus I could write and save programs for later use. I took some online courses and read many excellent books about Python programming. I taught teachers and students how to create turtle graphics using IDLE.
IDLE was a big improvement, but at PyConUS 2019 in Cleveland, I saw a presentation by Nicholas Tollervey that changed the way I learned and taught Python. Nick is an educator who created Mu, a Python editor specifically for young programmers (and even older ones like me). Mu can be installed on Linux, macOS, and Windows. It's easy to use and comes with excellent documentation and tutorials.
On Linux, you can install Mu from the command line.
On Ubuntu or Debian:
$ sudo apt install mu-editorOn Fedora or similar:
$ sudo dnf install muOr, you can use Python to do the install. First, ensure you have Python 3 installed:
$ python --versionIf that fails, try:
$ python3 --versionAssuming you have Python version 3 or better, install Mu using pip, the Python package manager:
$ python -m pip install mu-editor --userThen you can run Mu from the command line or create a shortcut using:
$ python -m pip install shortcut mu-editor --userMu is installed by default on the Raspberry Pi, which is a great plus. In the past couple of years, I have introduced students to the Raspberry Pi and Python programming using the Mu editor.
How to teach Python with Mu
Mu is a great way to show students how easy it is to get started with Python. Here's how I teach my students to start using it.
- Open the Mu editor.

(Don Watkins, CC BY-SA 4.0)
- Enter
import turtleto import the Turtle module, so you can get the turtle moving. My first lesson is drawing a simple square in Python code.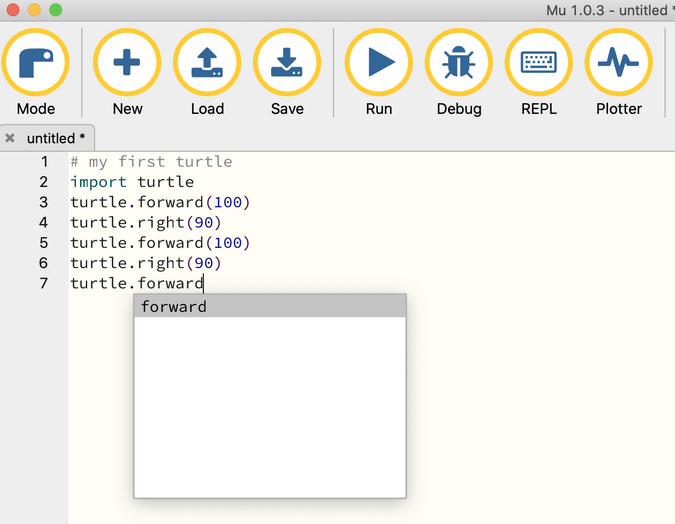
(Don Watkins, CC BY-SA 4.0)
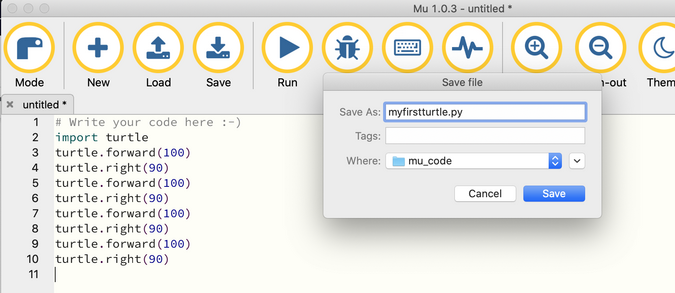
- Save this program, making sure that the file name ends in .py.
(Don Watkins, CC BY-SA 4.0)
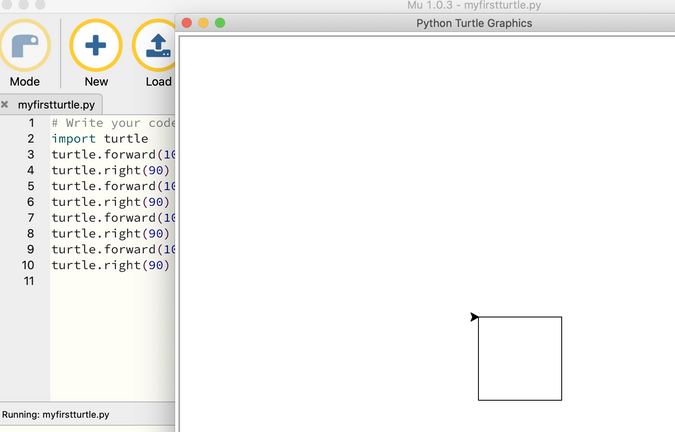
- Run the program. Running even a simple program like this is energizing—it's fun to see the graphical output of a program you wrote.
(Don Watkins, CC BY-SA 4.0)
Beyond the basics
After this simple lesson, I explain that there are some ways to simplify and expand on the basics the students have learned. One is creating a simpler turtle object, import turtle as t. Then I introduce a for loop as another way to draw a square with the turtle.
(Don Watkins, CC BY-SA 4.0)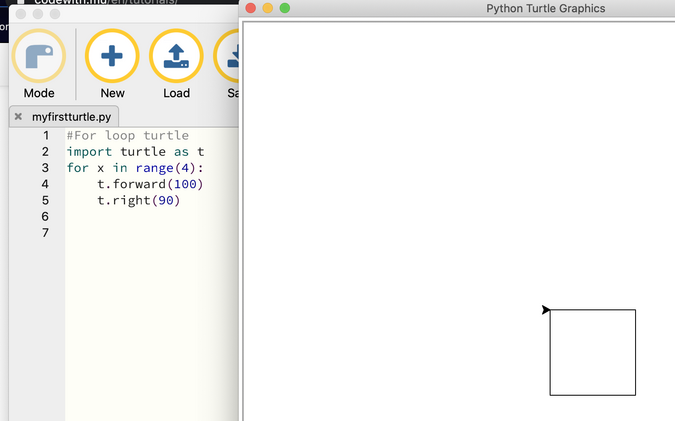
Next, I show how to create a my_square function as another way to draw a square.
(Don Watkins, CC BY-SA 4.0)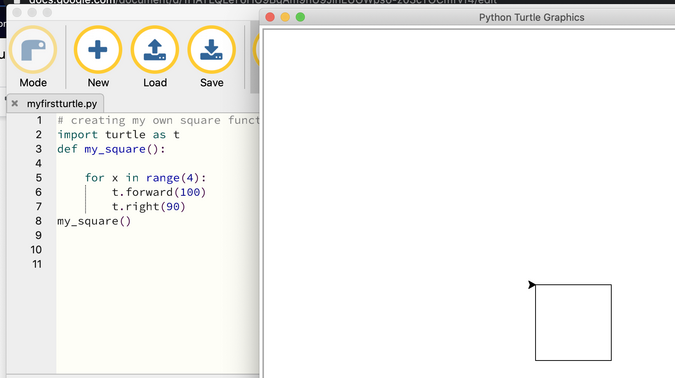
Later, I expand on this concept by introducing other turtle module methods, including penup, pendown, and pencolor. Soon, my students are developing more complex programs and iterating on them.
(Don Watkins, CC BY-SA 4.0)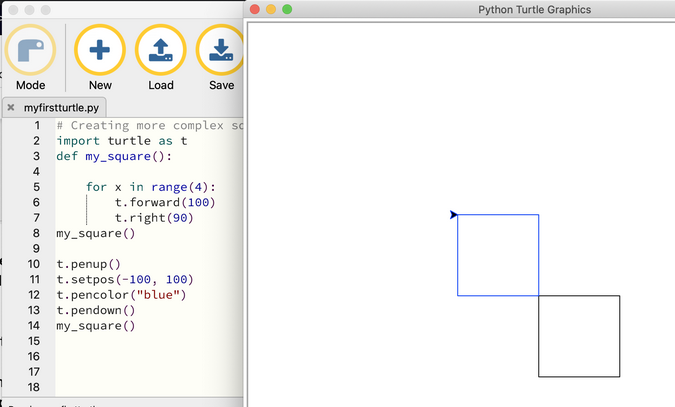
I am always eager to learn, and I would love to know how you are teaching Python in school or at home. Please share your experience in the comments.


2 Comments